7 Insider Rotator Cuff Physical Therapy Exercises to Save Your Shoulder from Surgery
- Nico A. Stürm
- Sep 14, 2025
- 2 min read
Are you among the millions in the U.S. with shoulder pain from rotator cuff injuries? You might be thinking about surgery or looking for other ways to feel better. But, what if you could strengthen your shoulder and avoid surgery?
With the right physical therapy exercises, you can. These exercises can help you move better, feel less pain, and live a better life. We'll show you seven insider exercises for your rotator cuff. They can help you make a smart choice about your treatment.
Understanding Rotator Cuff Injuries and Their Impact
The rotator cuff is a complex structure that can easily get injured. It's made of muscles and tendons that help keep the shoulder joint stable. When it gets hurt, it can cause pain, make moving harder, and weaken the shoulder.
Common Causes of Rotator Cuff Damage
Damage to the rotator cuff often comes from repetitive strain, sudden injuries, or just getting older. Doing things that involve moving your arm over your head, like throwing or lifting, can increase the risk. Falls onto the shoulder or outstretched hand can also cause tears.
Signs and Symptoms of a Rotator Cuff Injury
Signs of a rotator cuff injury include pain when you move your arm, feeling weak, and having trouble moving it as far as usual. Pain at night, especially when lying on the hurt side, is common. In serious cases, you might lose strength or find it hard to do certain movements.
The Anatomy of Your Rotator Cuff
The rotator cuff is made up of four muscles and their tendons: the supraspinatus, infraspinatus, teres minor, and subscapularis. These muscles work together to keep the shoulder joint stable and help you move your arm. Knowing how these parts work is key to understanding injuries and how to treat them.
Muscle/Tendon | Function | Common Injury Type |
Supraspinatus | Stabilizes shoulder joint, assists in abduction | Tendinitis, tears |
Infraspinatus | Rotates arm laterally, stabilizes shoulder | Tendinitis, strains |
Teres Minor | Assists in lateral rotation, adduction | Strains, tendinitis |
Subscapularis | Rotates arm medially, stabilizes shoulder | Tears, tendinitis |
Knowing the causes, symptoms, and structure of rotator cuff injuries helps people find the right way to get better. This can include physical therapy or other treatments.
Physical Therapy vs. Surgery: Making the Right Choice for Your Shoulder
Choosing between physical therapy and surgery for a rotator cuff injury is a big decision. It affects your recovery and shoulder health. Think carefully before making your choice.
When Conservative Treatment Is Appropriate
For mild to moderate rotator cuff injuries, physical therapy is often the first choice. It strengthens muscles, improves flexibility, and reduces pain. A leading orthopedic specialist says it's a good way to avoid surgery.
The goal is to get you back to your normal activities. This approach helps restore function and eases symptoms.
When Surgery Might Be Necessary
For severe injuries, like large tears, surgery might be needed. It offers a more lasting fix when conservative treatments fail. Always talk to healthcare experts before deciding on surgery.
The Recovery Timeline Comparison
Recovery times differ between physical therapy and surgery. Physical therapy takes weeks to months with gradual exercise progress. Surgery recovery is longer, needing months of rehab to regain strength and mobility.
Choosing between physical therapy and surgery depends on your injury's severity, health, and personal preferences. A healthcare professional can guide you to the best option for you.
Preparing for Effective Rotator Cuff Physical Therapy Exercises
Starting effective rotator cuff physical therapy requires the right setup. Make sure you have the right equipment and a good environment to begin your exercises.
Essential Equipment You'll Need
The right tools are key for your rotator cuff therapy. You'll need:
Resistance bands
Light dumbbells
A stable chair or bench
A mat for floor exercises
Creating the Optimal Exercise Environment
Your exercise area is very important. It should be:
Quiet and free from distractions
Well-ventilated
Comfortably lit
Warm-up Techniques for Safe Practice
Warming up is crucial before starting your exercises. Try these simple techniques:
Arm circles
Neck stretches
Shoulder rolls
These help get your muscles ready and reduce injury risk.
Exercise1:
External Rotation with Resistance Band
The external rotation with a resistance band is great for your shoulders. It strengthens the rotator cuff muscles, making your shoulder more stable. Adding this to your workout routine can really help your shoulder function better.
Proper Form and Technique
To do the external rotation right, start by attaching the resistance band at waist level. Hold the other end with your affected arm, elbow bent at 90 degrees and close to your body. Move your shoulder outward, keeping your arm still, and then go back to the start. Make sure your movements are controlled.
Common Mistakes to Avoid
A big mistake is letting your elbow move away from your body. This can hurt your shoulder. Keep your form right and use your core to support your shoulder.
Progression Options
When you get better at the exercise, you can make it harder. You can use a stronger band or change the angle of the exercise.
Beginner Modifications
Start with a lighter band to build strength.
Do the exercise with your arm at your side to ease the strain on your shoulder.
Advanced Variations
Use a stronger band to challenge your muscles more.
Try the exercise with your arm at different angles to work different parts of your rotator cuff.
Exercise2:
Scapular Retraction and Depression
To boost shoulder stability, add the scapular retraction and depression exercise to your routine. It targets muscles that support your shoulder blade. This improves shoulder function and lowers injury risk.
Proper Form and Technique
To do the scapular retraction and depression exercise right, start with good posture. You can use a resistance band or a light dumbbell for extra challenge.
Begin by retracting your scapula, pulling your shoulder blades together.
Then, depress your scapula, pulling them down towards your lower back.
Hold for a few seconds before releasing.
Common Mistakes to Avoid
Avoid using momentum or jerking your shoulders in the exercise. This can strain your muscles and joints.
Progression Options
As you get better, increase the challenge by adding more resistance or changing your body's angle.
Beginner Modifications
Beginners, start without resistance and focus on proper form and technique.
Advanced Variations
For advanced users, try thicker resistance bands or heavier dumbbells to push your scapular muscles harder.
Exercise3:
Modified Empty Can Exercise
The Modified Empty Can Exercise is key for strengthening the rotator cuff. It targets the supraspinatus muscle, which is vital for shoulder stability and function.
Proper Form and Technique
To do the Modified Empty Can Exercise right, hold a light dumbbell or resistance band with your thumb up. Your arm should be straight at your side. Lift your arm to shoulder level, then lower it back down slowly.
Keep control throughout and avoid swinging your arm.
Common Mistakes to Avoid
Don't lift your arm too high or use too much weight. This can strain your shoulder. Also, keep your posture right and avoid letting your shoulder roll forward.
Progression Options
When you get better, increase the weight or resistance used.
Beginner Modifications
Beginners, start with very light weights or resistance bands. Focus on getting the form right.
Advanced Variations
For advanced folks, use higher resistance or add it to a complex shoulder routine.
Exercise4:
Posterior Capsule Stretching
Adding posterior capsule stretching to your routine can help a lot. It targets the back of the shoulder joint. This makes your shoulder more flexible and lowers injury risk.
Proper Form and Technique
To stretch the posterior capsule right, follow these steps:
Stand or sit with good posture.
Cross one arm across your body, keeping it straight.
Use your other arm to gently pull the crossed arm toward your shoulder blade.
Hold the stretch for 15-30 seconds.
It's important to stretch correctly to avoid shoulder strain. Keep your posture straight and control your movements.
Common Mistakes to Avoid
Don't make these mistakes:
Pulling too hard, which can cause discomfort or injury.
Not maintaining good posture, reducing the effectiveness of the stretch.
Progression Options
As you get better, try these:
Stretch for longer.
Stretch deeper by pulling your arm further.
Beginner Modifications
If you're new, start with:
Stretch less deeply.
Stretch for 10-15 seconds.
Advanced Variations
For those who are more experienced, try:
Add a twist to the stretch.
Use a resistance band for more challenge.
Level | Depth of Stretch | Duration |
Beginner | Mild | 10-15 seconds |
Intermediate | Moderate | 15-30 seconds |
Advanced | Deep | 30-60 seconds |
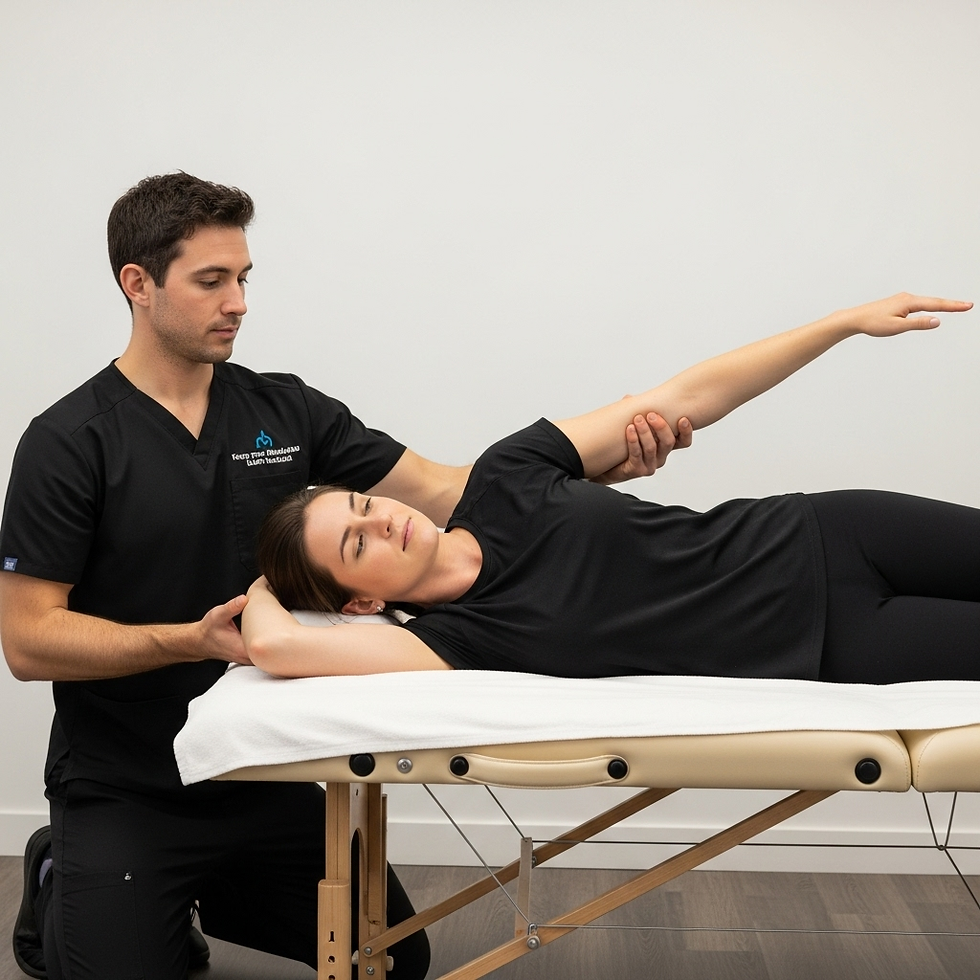
Posterior capsule stretching is a game-changer for athletes and individuals suffering from shoulder stiffness. It's a simple yet effective technique to improve shoulder mobility and reduce pain.
Exercise5:
Prone Horizontal Abduction
Prone Horizontal Abduction is a great exercise for improving shoulder function and lowering injury risk. It focuses on the Supraspinatus and Infraspinatus muscles. These muscles are key for shoulder stability and movement.
Proper Form and Technique
To do the Prone Horizontal Abduction right, follow these steps:
Lie on your stomach with your arms at your sides.
Slowly lift your arms out to the sides until they are at a 90-degree angle to your body.
Hold for a few seconds, then lower your arms back down.
Common Mistakes to Avoid
Avoid these common mistakes when doing the Prone Horizontal Abduction:
Lifting your arms too high or too fast.
Not keeping your core engaged, leading to poor posture.
Using momentum instead of controlled movement.
Progression Options
To make the Prone Horizontal Abduction exercise harder, try these:
Increasing the number of repetitions or sets.
Using light weights or resistance bands.
Beginner Modifications
For beginners, start by reducing the range of motion or using a shorter hold time. This will help build strength and confidence.
Advanced Variations
Advanced individuals can increase the challenge by adding more weight, increasing the hold time, or performing the exercise on an unstable surface.
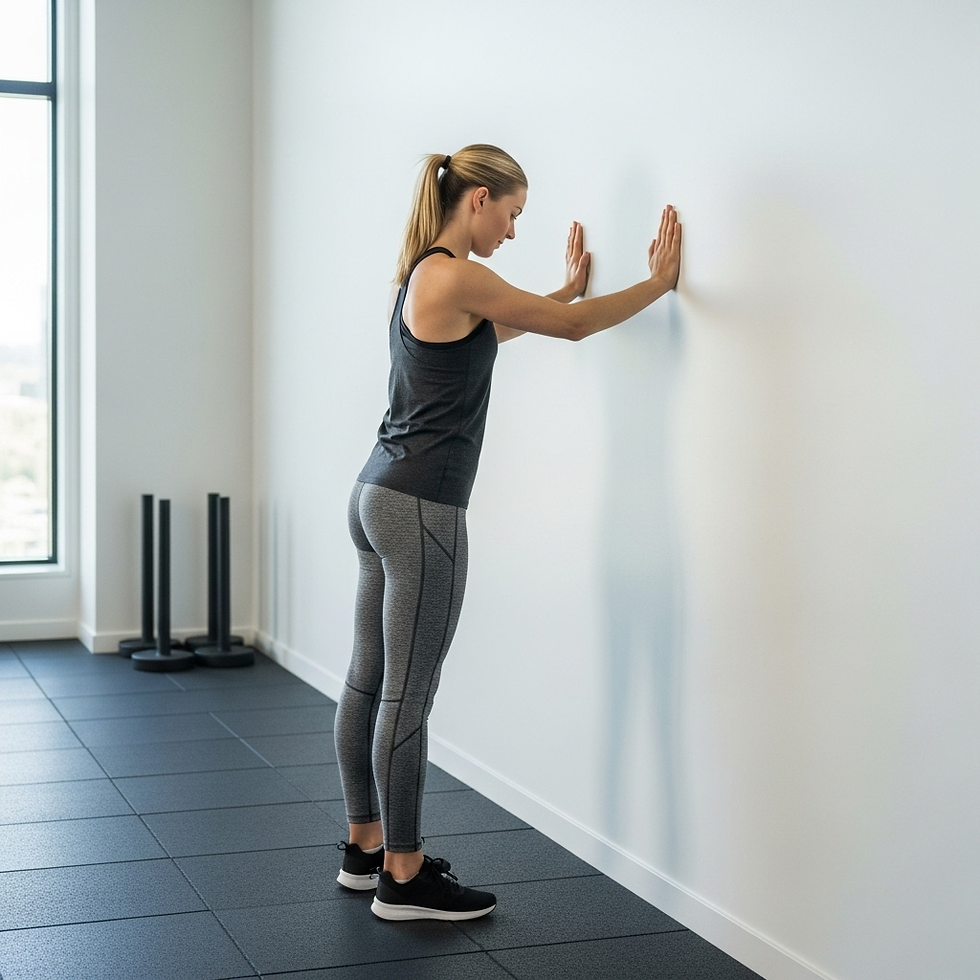
Exercise6:
Wall Slide with Scapular Control
The Wall Slide with Scapular Control is a great exercise for your rotator cuff therapy. It boosts shoulder mobility and strengthens the muscles around the scapula. These muscles are key for shoulder stability.
Proper Form and Technique
To do the Wall Slide right, stand with your back against a wall and feet apart. Slowly slide down the wall, keeping your shoulders down and away from your ears. Focus on squeezing your scapula together and controlling the movement.
Common Mistakes to Avoid
Don't let your shoulders shrug up towards your ears. This can strain your neck and shoulder muscles. Also, make sure to keep your scapula controlled to avoid poor posture and reduce the exercise's effectiveness.
Progression Options
To make the Wall Slide more challenging, you can adjust it based on your fitness level.
Beginner Modifications
Beginners, start by sliding down just a few inches. Focus on keeping the right form and controlling your scapula.
Advanced Variations
For more experienced people, slide down further or add resistance bands. This makes the exercise harder and strengthens your shoulder and scapular muscles more.
Adding the Wall Slide with Scapular Control to your therapy routine can improve your shoulder stability and mobility. This supports your rotator cuff rehabilitation.
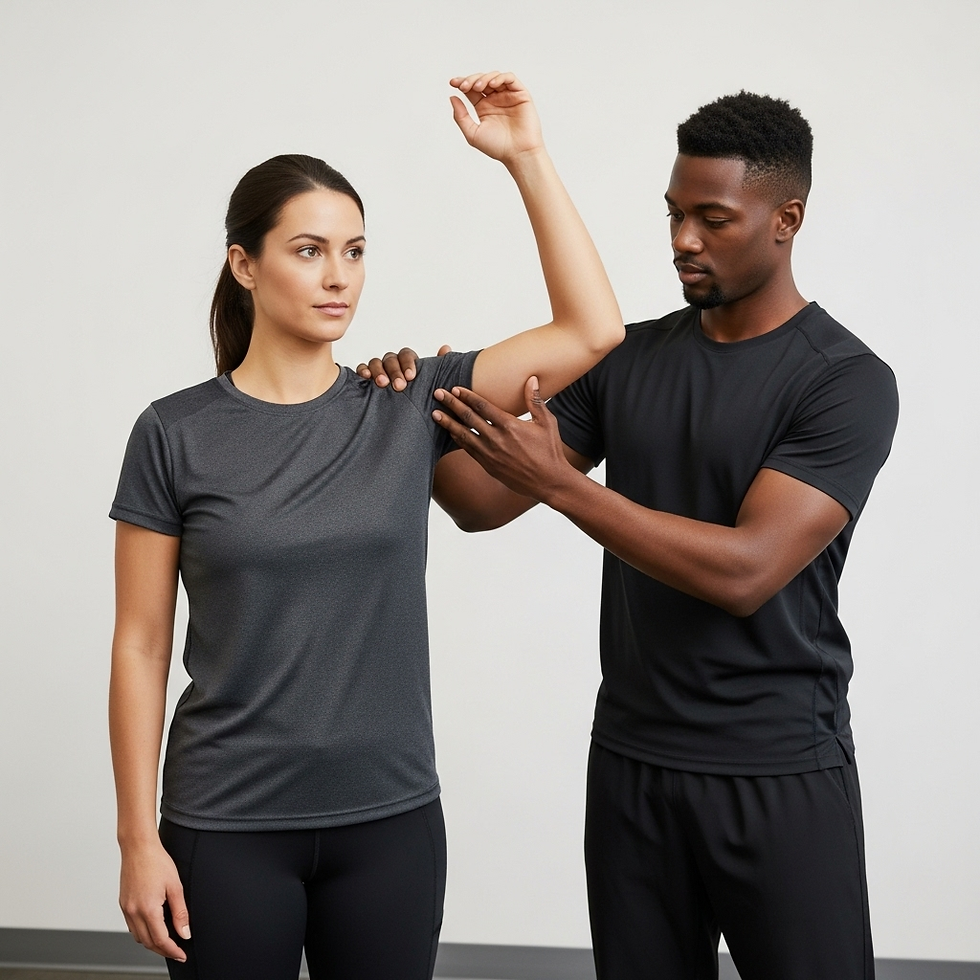
Exercise7:
Rhythmic Stabilization Techniques
To boost shoulder function and lower injury risk, add rhythmic stabilization to your workouts. This advanced technique makes the shoulder joint more stable. It does this by making muscles and nerves work harder to handle different forces and movements.
Proper Form and Technique
Begin by standing or sitting in a stable position. Use a physioball or BOSU ball for better movement. The goal is to keep your shoulder stable while resisting arm movements in different directions.
Keep your core tight and posture straight. The person helping you should apply gentle, then stronger, resistance. They should also change the direction to test your shoulder's stability.
Common Mistakes to Avoid
Don't forget to keep good posture. Bad posture can strain your shoulder and make the exercise less effective. Also, avoid letting your shoulder move out of place, as this can cause injury.
Progression Options
When you get better, try harder resistance, quicker direction changes, or use a less stable surface. These steps will make the exercise more challenging.
Beginner Modifications
If you're new, start with less resistance and slower movements. Doing the exercise near a stable surface can also help.
Advanced Variations
For experts, try rhythmic stabilization with your eyes closed. This boosts your sense of body position. You can also use a medicine ball for more dynamic movements.
Implementing Your Rotator Cuff Physical Therapy Exercises Program
Starting a rotator cuff exercise program needs careful planning. To get the best results, think about how often to do the exercises, how to make them harder, and what else can help. These steps are key to a successful recovery.
Recommended Frequency and Sets
For the best results, stick to a regular schedule. Try to do your rotator cuff exercises 2-3 times a week, with a day off in between. Begin with 2-3 sets of 8-12 repetitions for each exercise. Adjust these numbers as you get more comfortable and see progress.
Tracking Your Progress
It's important to keep track of how you're doing. Write down your exercises, sets, and reps, and any changes in your symptoms or shoulder function. This will show you what's working and what needs more work.
When to Advance Your Program
As you get better, it's time to make your exercises harder. Move on to a more challenging program when you can do the recommended sets and reps without pain. This might mean using more weight, adding new exercises, or changing old ones to be tougher.
Complementary Treatments to Enhance Recovery
There are other ways to help your recovery besides exercises. These include:
Ice and Heat Therapy
Anti-inflammatory Strategies
Activity Modifications
Ice and Heat Therapy
Ice and heat can help with pain and swelling. Use ice packs for 15-20 minutes after working out to reduce swelling. Before working out, use heat to improve blood flow and flexibility.
Anti-inflammatory Strategies
Adding anti-inflammatory steps to your routine can lessen pain and swelling. This might mean eating more omega-3 fatty acids or taking anti-inflammatory meds as your doctor suggests.
Activity Modifications
Changing your daily activities to avoid hurting your shoulder is important. Avoid heavy lifting, bending, or anything that makes your symptoms worse. Choose low-impact activities that help your shoulder move and get stronger without too much stress.
By adding these elements to your rotator cuff program and adjusting your therapy schedule as needed, you can improve your shoulder health and recovery.
FAQ's About Rotator Cuff Physical Therapy Exercises
What are the best physical therapy exercises for a rotator cuff injury?
The top exercises for a rotator cuff injury include using a resistance band for external rotation. Also, scapular retraction and depression are key. Modified empty can, posterior capsule stretching, and prone horizontal abduction are also important.
Wall slide with scapular control and rhythmic stabilization techniques are crucial too.
How often should I perform rotator cuff physical therapy exercises?
Do these exercises 2-3 times a week, as advised by your healthcare professional. Make sure to rest at least one day in between.
Can physical therapy exercises prevent the need for rotator cuff surgery?
Yes, they can. Strengthening muscles and improving mobility help. This reduces pain and inflammation, possibly avoiding surgery.
What is the proper form and technique for rotator cuff exercises?
Use controlled movements and engage the right muscles. Avoid jerky movements. Always follow a healthcare professional's or physical therapist's guidance.
How long does it take to see results from rotator cuff physical therapy exercises?
Results vary based on injury severity, exercise consistency, and individual factors. You might see improvements in 6-8 weeks.
Can I do rotator cuff exercises at home?
Yes, many exercises can be done at home with simple equipment like resistance bands. But, it's vital to do them correctly and consult a professional.
Are there any complementary treatments that can enhance recovery from a rotator cuff injury?
Yes, treatments like ice and heat, anti-inflammatory strategies, and modifying activities can help. Talk to a healthcare professional to find the best approach for you.
Conclusion
Adding these 7 insider rotator cuff physical therapy exercises to your routine can help a lot. It's a big step towards avoiding surgery and helping your shoulder heal.
Rotator cuff exercises are key for fixing your shoulder. They make your muscles and tendons stronger. This improves your shoulder's flexibility, reduces pain, and boosts its function.
Exercises like using resistance bands for external rotation, scapular retraction, and prone horizontal abduction work well. By sticking to a regular routine and keeping track of your progress, you can see great results. This leads to better shoulder health.
Begin your path to a healthier shoulder today. Add these exercises to your daily routine. With regular practice and patience, you can beat rotator cuff injuries. You'll keep your shoulder strong and healthy for many years.
If you have any questions or would like to share your experiences, please feel free to leave a comment below. Your feedback is invaluable, and together, we can support each other on this journey towards recovery.
The content on this website does not constitute a professional opinion, a recommendation, a substitute for consulting an expert or receiving medical advice from a care provider.


Comments